> ## Documentation Index
> Fetch the complete documentation index at: https://docs.omi.me/llms.txt
> Use this file to discover all available pages before exploring further.
# Setup
> Connect your AI assistant to the Omi MCP server
## Hosted Server (Recommended)
The fastest way to get started — no installation required.
Open the Omi app and navigate to **Settings → Developer → MCP** to generate your API key.
Your key will look like: `omi_mcp_...`
Use the following connection details:
* **Server URL:** `https://api.omi.me/v1/mcp/sse`
* **Authorization:** `Bearer omi_mcp_...` (your generated key)
* **Transport:** Streamable HTTP (MCP 2025-03-26 spec)
***
## Client Configuration
Add to your `claude_desktop_config.json`:
```json theme={null}
{
"mcpServers": {
"omi": {
"url": "https://api.omi.me/v1/mcp/sse",
"headers": {
"Authorization": "Bearer omi_mcp_YOUR_KEY_HERE"
}
}
}
}
```
**Config file location:**
* macOS: `~/Library/Application Support/Claude/claude_desktop_config.json`
* Windows: `%APPDATA%\Claude\claude_desktop_config.json`
Go to **Cursor Settings → MCP** and add a new server:
* **Name:** Omi
* **Transport:** SSE
* **URL:** `https://api.omi.me/v1/mcp/sse`
* **Headers:** `Authorization: Bearer omi_mcp_YOUR_KEY_HERE`
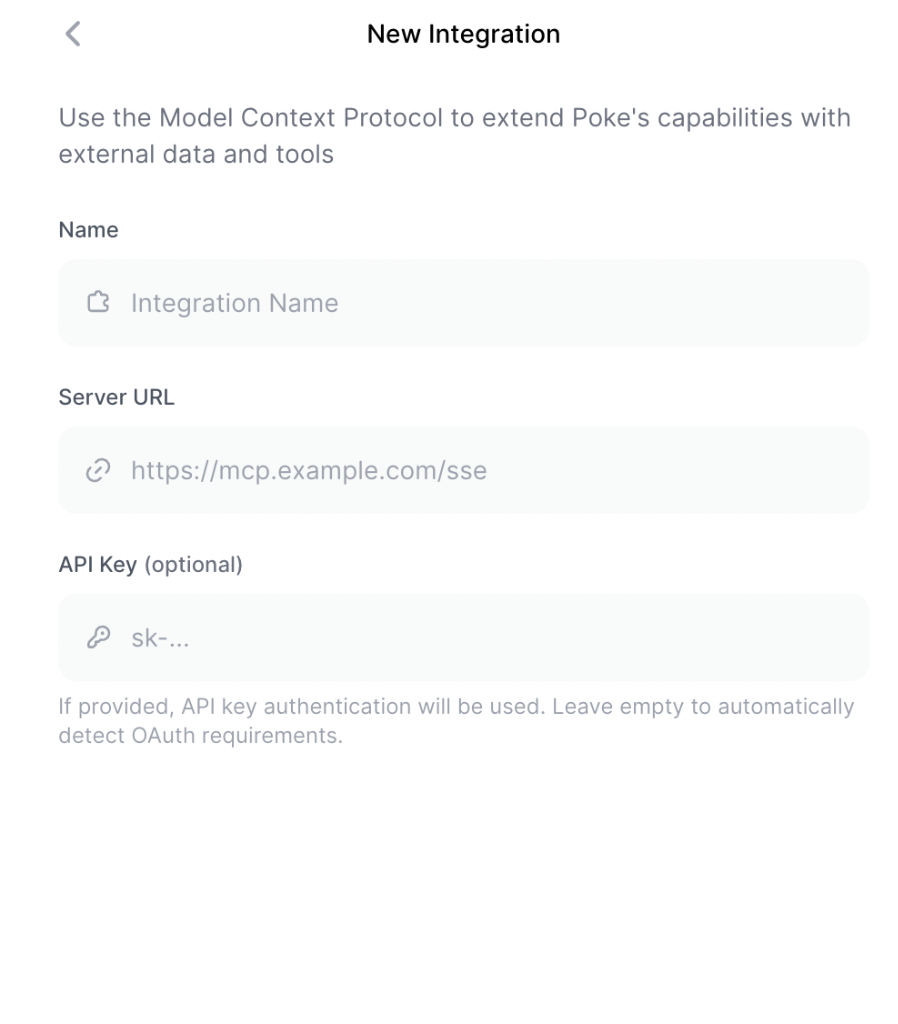 Enter the server URL and API key in Poke's MCP connection settings.
Any MCP client that supports the **Streamable HTTP** transport (2025-03-26 spec) will work:
```bash theme={null}
# Endpoint
POST https://api.omi.me/v1/mcp/sse
# Headers
Authorization: Bearer omi_mcp_YOUR_KEY_HERE
Content-Type: application/json
Accept: text/event-stream # for SSE responses
# Body (JSON-RPC 2.0)
{"jsonrpc": "2.0", "id": 1, "method": "initialize", "params": {}}
```
***
## Docker (Self-Hosted)
If you prefer to run the MCP server locally:
Open the Omi app → **Settings → Developer → MCP** to generate your key.
Install Docker. We recommend [OrbStack](https://orbstack.dev/) for macOS.
Add to your `claude_desktop_config.json`:
```json theme={null}
{
"mcpServers": {
"omi": {
"command": "docker",
"args": ["run", "--rm", "-i", "-e", "OMI_API_KEY=omi_mcp_YOUR_KEY_HERE", "omiai/mcp-server"]
}
}
}
```
The API key can also be provided with each tool call. If not provided, the server uses the `OMI_API_KEY` environment variable as a fallback.
***
## Custom Backend URL
If you are self-hosting the Omi backend:
```bash theme={null}
export OMI_API_BASE_URL="https://your-backend-url.com"
```
Only needed for self-hosted Omi instances. The default URL points to the official Omi API.
Enter the server URL and API key in Poke's MCP connection settings.
Any MCP client that supports the **Streamable HTTP** transport (2025-03-26 spec) will work:
```bash theme={null}
# Endpoint
POST https://api.omi.me/v1/mcp/sse
# Headers
Authorization: Bearer omi_mcp_YOUR_KEY_HERE
Content-Type: application/json
Accept: text/event-stream # for SSE responses
# Body (JSON-RPC 2.0)
{"jsonrpc": "2.0", "id": 1, "method": "initialize", "params": {}}
```
***
## Docker (Self-Hosted)
If you prefer to run the MCP server locally:
Open the Omi app → **Settings → Developer → MCP** to generate your key.
Install Docker. We recommend [OrbStack](https://orbstack.dev/) for macOS.
Add to your `claude_desktop_config.json`:
```json theme={null}
{
"mcpServers": {
"omi": {
"command": "docker",
"args": ["run", "--rm", "-i", "-e", "OMI_API_KEY=omi_mcp_YOUR_KEY_HERE", "omiai/mcp-server"]
}
}
}
```
The API key can also be provided with each tool call. If not provided, the server uses the `OMI_API_KEY` environment variable as a fallback.
***
## Custom Backend URL
If you are self-hosting the Omi backend:
```bash theme={null}
export OMI_API_BASE_URL="https://your-backend-url.com"
```
Only needed for self-hosted Omi instances. The default URL points to the official Omi API.