Omi Consumer Open Source Hardware
The Omi Consumer is fully open source. All design files needed to study, modify, manufacture, and sell the hardware are available under the MIT license.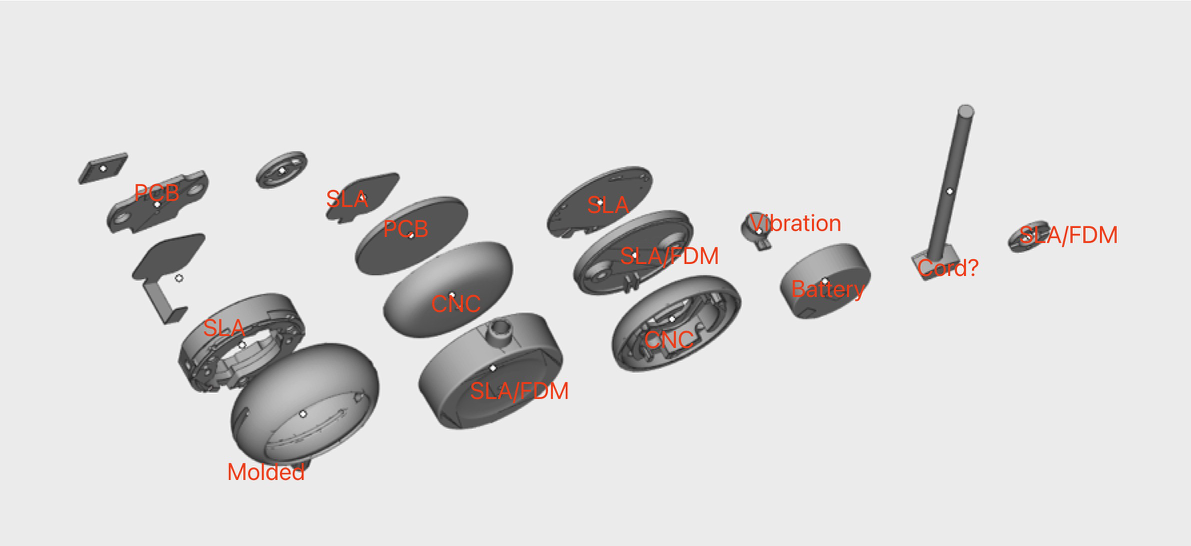
Omi Consumer — all components identified
What you’ll need to build an Omi:
- Tools: Soldering station with hot air, solder paste + stencils, multimeter, tweezers, UV lamp (for adhesive)
- Software: KiCad (free — all shipped PCB sources are KiCad 9 projects despite the “altium” folder names), FreeCAD or Fusion 360 (mechanical), nRF Connect SDK (firmware)
- Accounts: PCB fabricator (JLCPCB/PCBWay), component distributor (Mouser/DigiKey/LCSC)
- Skills: SMT soldering (QFN packages), basic mechanical assembly, firmware flashing via SWD
- Budget: ~$30-50 per unit in small quantities (PCBs + components + enclosure, excluding tools)
- Time: 2-3 weeks (PCB fabrication) + 1-2 hours (assembly per unit)
Electronics
PCB schematics, KiCad source, Gerber files for mainboard, charger, and FPC
Mechanical & Packaging
STEP files for enclosure, charger, foam inserts, and packaging
Assembly & BOM
88-component BOM with manufacturer part numbers and assembly photos
License
MIT license — use, modify, and distribute freely
Quick Specs
Repository Structure
Build Journey
1
Order PCBs (Week 1)
Upload Gerber ZIPs to your PCB manufacturer. Order all 3 boards together to save on shipping.
Mainboard Gerbers
4-layer FR4, 0.6mm, 21x21mm, ENIG, blind/buried vias
Charger Gerbers
2-layer FR4, 1.0mm, 13x20mm, ENIG
FPC Gerbers
2-layer polyimide, 0.3mm, 29x13mm
2
Source Components (Week 1)
Use the BOM CSV to order from distributors. The MPN column has exact manufacturer part numbers.
3
Manufacture Enclosure (Week 1-2)
Parts are organized by manufacturing process in
mechanical/parts/.- CNC Parts
- 3D Printed Parts
- Injection Molding
Aluminium covers (Case A + B) and copper touch pins. Send STEP files to a CNC vendor. Minimum order typically 10-50 units.
For prototyping, you can 3D print the covers in SLA resin first to verify fit before committing to CNC.
4
Assemble PCBs (Week 2-3)
Apply solder paste with stencil, place components, reflow. See the full assembly guide.
5
Mechanical Assembly
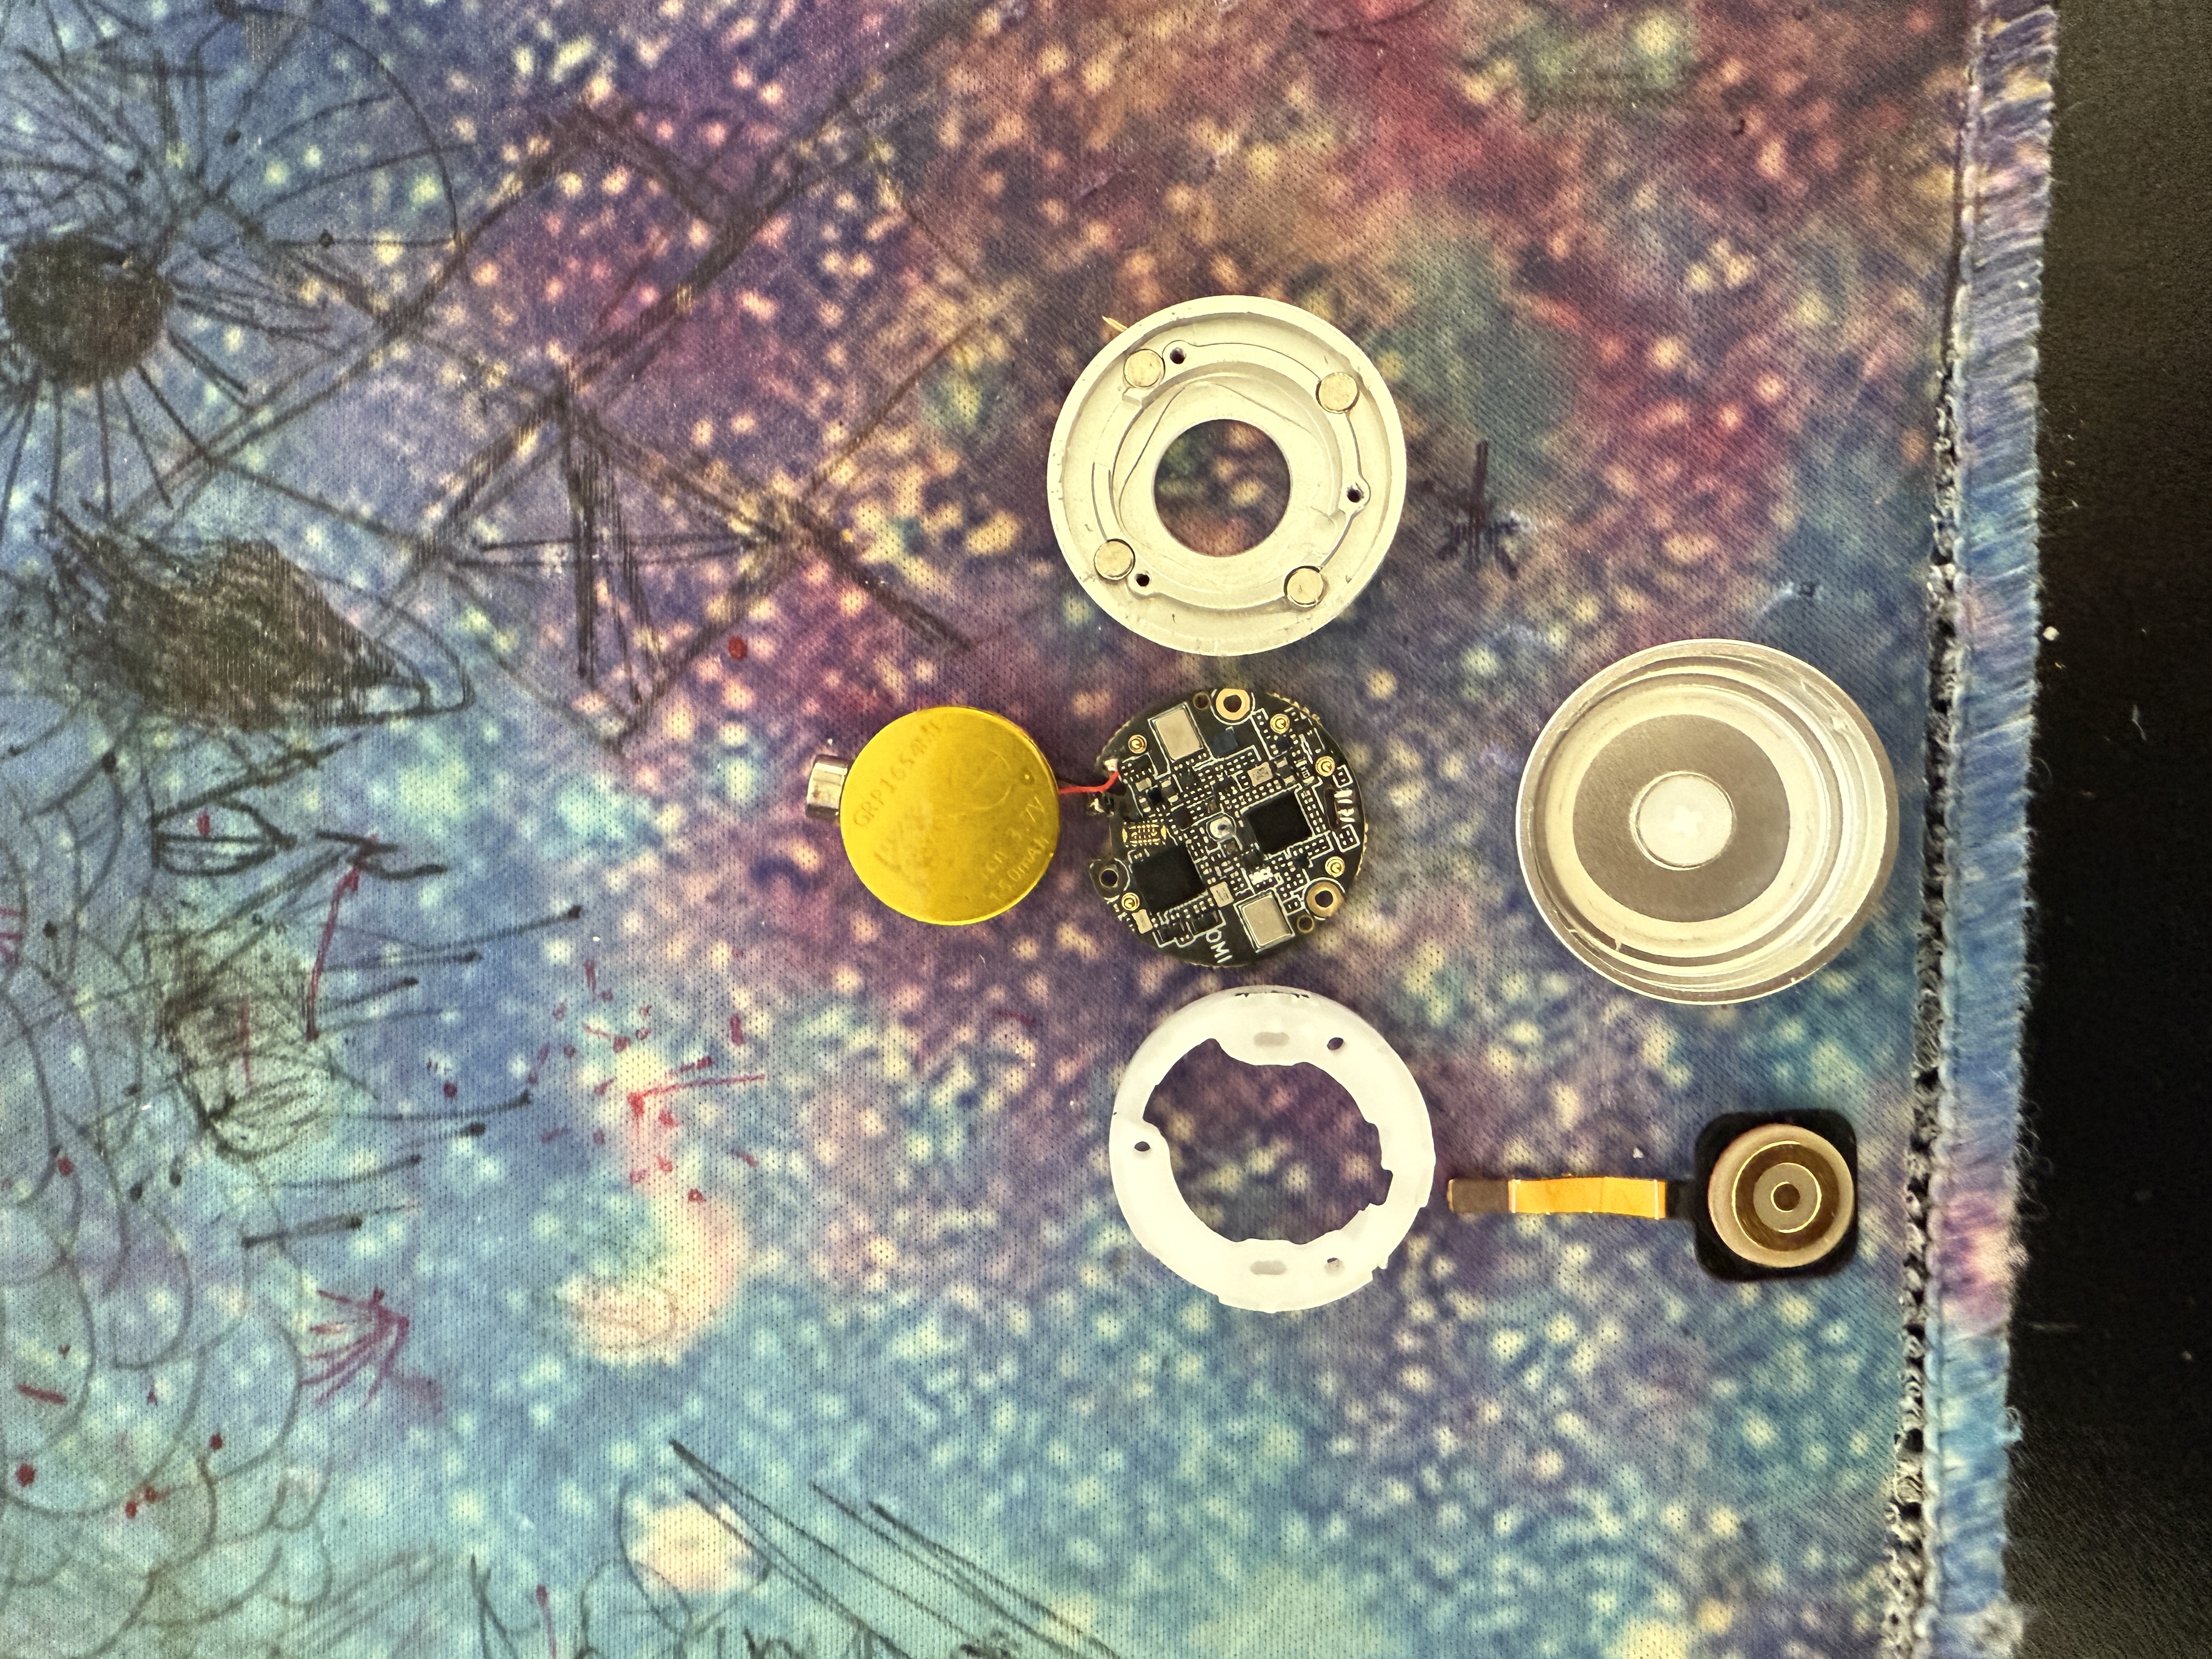
Components ready for assembly
6
Flash & Test
Flash firmware via SWD debug port using a J-Link or nRF DK. Follow the firmware compilation guide.
Verification checklist: BLE advertising visible in nRF Connect app, both microphones recording audio, Wi-Fi scanning networks, IMU reporting orientation, LED cycling RGB, charger detecting dock contact.